Homepage "
3D printing
Additive manufacturing
3D printing
Additive manufacturing
3D Printing - Additive Manufacturing
The field of “additive manufacturing processes” and especially 3D printing is based on layer technology. The additive manufacturing process is used to produce series parts or functional prototypes in 3D from plastic, which are characterized above all by constant component quality.
We offer you the so-called selective laser sintering (SLS) process. This gives you 3D printed components at a new level.
- Integrate function
- Get or increase stability of your products
- Let your component become lighter
- Reduce assembly work
Further advantages of this process are the high (long-term) stability, the various aftertreatment options and good chemical resistance. In addition, the components produced by additive manufacturing processes are characterized by their attention to detail and high separation resolution.
- Production of series parts and functional prototypes
- Reproducible and constant component quality
- Surface treatment
- Installation space of 330x330x600
- Construction progress (depending on material) up to 48 mm/h with a layer thickness of 0.12 mm
- Balanced property profile
- High strength and stiffness
- Good chemical resistance
- High long-term stability
- Good selectivity resolution and detail
- Various treatment options according to the process (e.g. metallization, stove enamelling, vibratory grinding, dip dyeing, gluing, powder coating, flocking)
- Biocompatible according to EN ISO 10993-1 and USP/level VI/121 °C
The process of selective laser sintering

You decide whether your process starts in our development department. Important – in order to print a 3D component, a CAD body must be available. Our department for development and design will be happy to support you in this.
3D printing offers new possibilities in the design and layout of components.
- Provide sharp edges with curves
- Material-saving construction
- One piece construction
- Lightweight construction principles
- Integrate functional components in the design
- Avoid mass accumulation
Typical geometric shapes
- Use pull triangles instead of curves
- create transitions
- Integrate labeling
- Subject: Confusion security
- Consider cleaning the component?
- Integrate channels


Checklist / Design Guide:
- Does the component already exist?
- Does the component to be re-designed?
- Can the component be completely repositioned?
- Additive manufacturing is also suitable whereas components with other manufacturing processes are complex and cost-intensive.
- Do I understand the application of the component? What problem does it solve?
- Question the components
- Why is it built the way it is built? What was the intention?
- Why can't the component be lighter and smaller?
- What can be fundamentally improved by to additive manufacturing?
- Dynamics
- Weight
- Mountability
- Confusion protection - no more incorrect assembly possible?
- Clarify interfaces
- How is the component connected to other components?
- Does it always have to be a screw? Does it always have to be a thread? Would a plug-in mechanism also be possible? Can components be glued?
- Heating phase: Our machine heats up for up to two hours.
- Construction time: How long the construction process itself is depends on how many products/ in what density at what height are actually in the machine.
- Cooling phase: The cooling phase starts afterwards. Our rule of thumb - cooling phase = construction time
- Depending on the post-processing, you will usually receive a finished component within 2-4 working days.
- To ensure that the components are built to the desired quality, it is important to observe these process stages and process times.
- Please send us your data – we will check the data set for “feasibility” and will be happy to discuss it with you if there are any further questions.
- As soon as the data set has been checked and approved, the components are aligned in the construction job.
- Software: Our software ensures that the data sets are divided up (sliced) so that a new product can be created layer by layer during the printing phase.


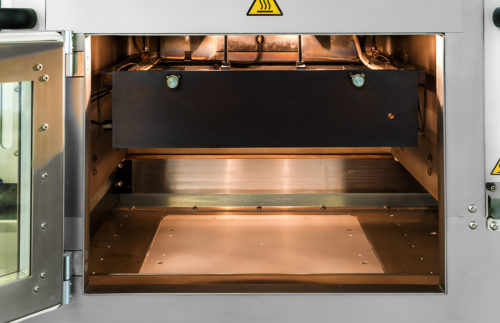
Installation space of the EOS P369: 330x330x600
- Principle
Layer-by-layer fusion of plastic powder (PA12) - The selective laser sintering process briefly explained: A layer of powder is deposited on the building platform. The cross-section of the component is melted locally with the help of a CO2 laser. The building platform is lowered and a new powder layer is applied. Layer by layer, three-dimension nal components are created.
- Unpacking station: The construction job is brought from the printer to the unpacking station via a removable frame. Here the parts are removed from the powder cake one after the other.
- The roughly removed powder is recycled.
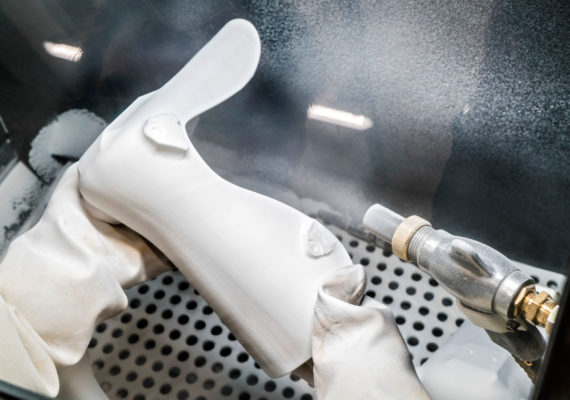
- Glass bead blasting: The last remaining powder is removed by glass bead blasting. This powder cannot be recycled.


- In addition to the visual inspection, a component measurement is also carried out.
- For the quality assurance of our own products, we print so-called tension samples. These give us information about the product and print quality.
- We thereby achieve a stable process and a continuously high quality.
Components from the SLS process can be after treated in different ways and thus obtain different surface qualities.
- Infiltration – the surface is sealed and is less susceptible to dirt and chemicals
- Vibratory grinding – surface is somewhat smoothed
- Chemical smoothing - The surface is smooth
- Dip dyeing - The components can be dyed
- The colour does not build up on the component, but penetrates into the component.
- Painting - The components can be painted
- The colors can build up and, if necessary, reduce mobility
- Flocking – Plastic fibers are applied with the help of an adhesive. An electrostatic field causes the fibers to straighten and can be applied to the component.


You decide whether your process starts in our development department. Important – in order to print a 3D component, a CAD body must be available. Our department for development and design will be happy to support you in this.
3D printing offers new possibilities in the design and layout of components.
- Provide sharp edges with curves
- Material-saving construction
- One piece construction
- Lightweight construction principles
- Integrate functional components in the design
- Avoid mass accumulation
Typical geometric shapes
- Use pull triangles instead of curves
- create transitions
- Integrate labeling
- Subject: Confusion security
- Consider cleaning the component?
- Integrate channels


Checklist / Design Guide:
- Does the component already exist?
- Does the component to be re-designed?
- Can the component be completely repositioned?
- Additive manufacturing is also suitable whereas components with other manufacturing processes are complex and cost-intensive.
- Do I understand the application of the component? What problem does it solve?
- Question the components
- Why is it built the way it is built? What was the intention?
- Why can't the component be lighter and smaller?
- What can be fundamentally improved by to additive manufacturing?
- Dynamics
- Weight
- Mountability
- Confusion protection - no more incorrect assembly possible?
- Clarify interfaces
- How is the component connected to other components?
- Does it always have to be a screw? Does it always have to be a thread? Would a plug-in mechanism also be possible? Can components be glued?
- Heating phase: Our machine heats up for up to two hours.
- Construction time: How long the construction process itself is depends on how many products/ in what density at what height are actually in the machine.
- Cooling phase: The cooling phase starts afterwards. Our rule of thumb - cooling phase = construction time
- Depending on the post-processing, you will usually receive a finished component within 2-4 working days.
- To ensure that the components are built to the desired quality, it is important to observe these process stages and process times.
- Please send us your data – we will check the data set for “feasibility” and will be happy to discuss it with you if there are any further questions.
- As soon as the data set has been checked and approved, the components are aligned in the construction job.
- Software: Our software ensures that the data sets are divided up (sliced) so that a new product can be created layer by layer during the printing phase.


Installation space of the EOS P369: 330x330x600
- Principle
Layer-by-layer fusion of plastic powder (PA12) - The selective laser sintering process briefly explained: A layer of powder is deposited on the building platform. The cross-section of the component is melted locally with the help of a CO2 laser. The building platform is lowered and a new powder layer is applied. Layer by layer, three-dimension nal components are created.
- Unpacking station: The construction job is brought from the printer to the unpacking station via a removable frame. Here the parts are removed from the powder cake one after the other.
- The roughly removed powder is recycled.
- Glass bead blasting: The last remaining powder is removed by glass bead blasting. This powder cannot be recycled.


- In addition to the visual inspection, a component measurement is also carried out.
- For the quality assurance of our own products, we print so-called tension samples. These give us information about the product and print quality.
- We thereby achieve a stable process and a continuously high quality.
Components from the SLS process can be after treated in different ways and thus obtain different surface qualities.
- Infiltration – the surface is sealed and is less susceptible to dirt and chemicals
- Vibratory grinding – surface is somewhat smoothed
- Chemical smoothing - The surface is smooth
- Dip dyeing - The components can be dyed
- The colour does not build up on the component, but penetrates into the component.
- Painting - The components can be painted
- The colors can build up and, if necessary, reduce mobility
- Flocking – Plastic fibers are applied with the help of an adhesive. An electrostatic field causes the fibers to straighten and can be applied to the component.
FAQ - Frequently asked questions
- Design freedom
- Functional integration
- Individualization
- Cost advantages through tool-free production
- Cost advantages through reduction of components in an assembly
- Process reliability
- Risk management
- Time saving
- Variety of materials
Construction time (depending on material) up to 48 mm/h with a layer thickness of 0.12mm
Installation space of 340x340x600
- We offer SLS - laser sintering
- Other possibilities are:
- STL - Stereolithography
- FDM - Fused Deposition Modeling
- SLM - Selective laser melting for metals
- Infiltration – the surface is sealed and is less susceptible to dirt and chemicals
- Vibratory grinding - surface is somewhat smoothed
- Chemical smoothing – the surface is smooth
- Dip dyeing – the components can be dyed
- The colour does not build up on the component, but penetrates into the component.
- Painting - The components can be painted
- The colors can build up and, if necessary, reduce mobility
- Flocking – Plastic fibers are applied with the help of an adhesive. An electrostatic field causes the fibers to straighten and can be applied to the component.


